Upgrading from Windows 10 to Mint
19th August 2025
Upgrading from Windows 10 to Linux Mint Cinnamon
By Stephen Davidson (aka Davo esq)
With the date for Windows 10 support ending coming up rapidly on 14th October 2025, people may be planning to upgrade to Windows 11, if their computer hardware meets Microsoft’s requirements. People whose computers running Windows 10 that have been deemed to have unsupported hardware by Microsoft, have a few choices which I covered in an article in June 2025 PC Update. Briefly, keep running Windows 10 hoping you don’t get hit by malware, etc (not a good idea), upgrade to Windows 11 using one of the methods I covered in that June 2025 article, or use one of the options that Microsoft very recently made available to prolong Windows 10 support for a single further year.
Or, dump Windows with its hassles and upgrade to Linux. If you are basically using your computer for emails, surfing the web, typing simple documents and spreadsheets, then Linux is a great (free) option. There are Linux programs that enable you to edit photos and video’s that are the equal of those available on Windows, as well as generally being free. LibreOffice is a great free replacement for Microsoft Office that is available in almost all Linux distributions. David Hatton of the Northern Suburbs Linux SIG recently presented via zoom an excellent “how to” about either setting up a dual boot system with Windows and Linux Mint Cinnamon, or, wiping Windows from your computer solely installing and running Linux Mint. The Cinnamon version is a good choice for people coming from Windows as it is easy to learn. Another option that people may also like is Linux Mint Mate, which is also easy to use. This article, like David’s presentation, will concentrate on Mint Cinnamon.
NOTE: Before you follow the following guide make sure you backup your Windows boot disk, just in case. If creating a dual boot arrangement with Linux Mint and Windows, make a system image using whatever imaging/backup program you use (eg Macrium Reflect, Acronis TrueImage, etc). If erasing and removing Windows, backup all your files (eg photos, video’s, documents, etc) to an external USB drive. You can restore these files in your new Linux Mint installation later.
What follows is a detailed follow up explanation how to do a dual boot Linux Mint installation, or, wipe Windows followed by Mint install.
- Downloading Linux Mint 22.1 Cinnamon
You can download the Linux Mint 22.1 Cinnamon ISO file from these links –
https://mirror.aarnet.edu.au/pub/linuxmint/stable/22.1/linuxmint-22.1-cinnamon-64bit.iso
https://mirror.math.princeton.edu/pub/linuxmint/stable/22.1/linuxmint-22.1-cinnamon-64bit.iso
Remember where you save the 2.9GB ISO file.
- Download Rufus
We’ll be using Rufus to “burn” the Mint ISO to a USB stick that you will boot from to install Mint. The USB stick needs to be at least 4GB in size.
Rufus can be downloaded from –
https://github.com/pbatard/rufus/releases/download/v4.9/rufus-4.9.exe
- Using Rufus to “burn” the Mint ISO to a USB stick.
Run by double clicking on Rufus to get the following (Fig 1) –
Fig 1 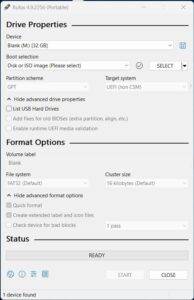
Click on the “SELECT” button (red arrow above in Fig 1), navigate to, and choose the Mint Cinnamon ISO file.
Make sure that your USB stick is chosen under the Device heading at the top (green arrow above in Fig 1).
Click on the “START” button at the bottom when ready to burn to the USB stick.
Fig 2 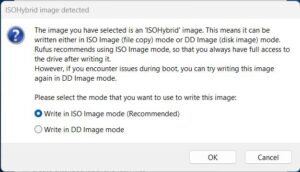
If you get the above dialog box (Fig 2), click “OK” followed by “OK” again. It should take about 4 minutes to complete depending on the speed of your computer and USB stick.
- Booting from the Mint Cinnamon USB stick and installing
You now need to boot from the Mint USB stick you just created. With your computer turned off, plug the USB stick into a USB port and while powering on your computer, hold down whatever key your computer uses to access the UEFI boot menu (could be F12, F11, etc check your motherboard manual if not sure). When the UEFI boot menu appears, choose your USB stick and press enter to boot Mint from the USB stick.
At the screen below (Fig 3), highlight the “Start Linux Mint” option and press the return key.
 Fig 3
Fig 3
You should then arrive at the Mint desktop as shown below (Fig 4) –
Double click on the “Install Linux Mint” icon at the top left to begin installation.
Fig 4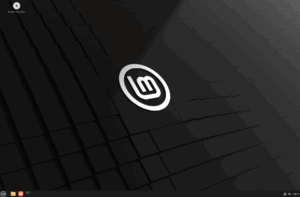
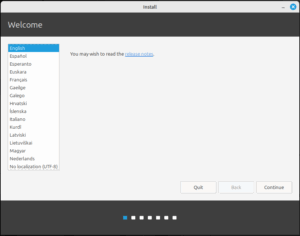 Fig 5
Fig 5
Click on whatever language you want (English here) as above (Fig 5) and click “Continue”.
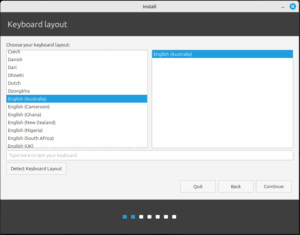 Fig 6
Fig 6
Click on the required Keyboard layout as above (Fig 6), (you have to scroll up to find the English (Australian) option) and click on “Continue”.
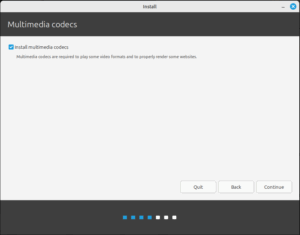
Fig 7
At the Multimedia codecs screen shown below (Fig 7), if you have internet access, check the “Install multimedia codecs” checkbox and click “Continue”. It will take a little while for the codecs to be downloaded. If you do not have internet access at this stage, you can install the extra multimedia codecs later, after final installation.
It is at the next screen below (Fig 8) that you need to decide if you want to dual boot Linux Mint with Windows 10, or, wipe and remove Windows to allow Linux Mint to take over the entire drive.
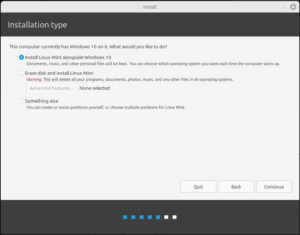
Fig 8
If you chose “Install Linux Mint alongside Windows 10” (at the red arrow Fig 8) then you will be setting up a dual boot system (probably not the best option since support for Windows 10 will end at some point anyway).
If you chose the “Erase disk and install Linux Mint” option (at the green arrow Fig 8), then Windows will be wiped and removed to allow Linux Mint to take over the entire drive. This would be the better option. See later for instructions for this option.
5A Install Linux Mint alongside Windows 10 option – dualboot
The following instructions are if you want to dual boot Windows 10 with Linux Mint. This is probably not the best option as support for Windows 10 will end eventually, however I have included it for those that may want this option.
Click “Continue” with the “Install Linux Mint alongside Windows 10” checked, to get the next screen shown below (Fig 9).
The red arrow is pointing to a slider which can be clicked on and dragged to reduce the Windows 10 partition to a smaller size if wanted to enlarge the size of the Mint partition. Mint will prevent you from trying to make the Windows partition too small. You will also be prevented from making the Mint partition too small.
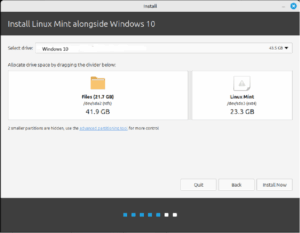
Fig 9
Once you have resized the partitions, click on “Install Now” to get the following warning (Fig 10).
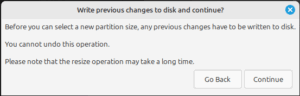
Fig 10
When ready click on “Continue”. Click “Continue” again if you get another dialog box asking to “Write the changes to disks?”.
You will then be asked for your location as indicated below (Fig 11). Click on the nearest city you want (Melbourne) and click on “Continue”.
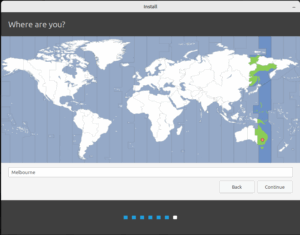
Fig 11
In the next screen shown below (Fig 12), type in your name, username and password. You can opt to login to Mint automatically if you wish by clicking on that option. Click on “Continue”.
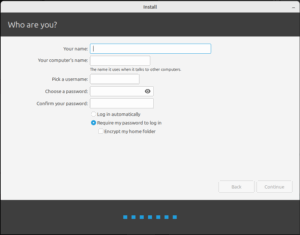
Fig 12
Linux Mint will then begin installing and copying files as shown below (Fig 13). Installation time will vary depending on the speed of your CPU, speed of storage device and amount of RAM. The faster the better of course. While installing, a slideshow of information will be shown that may be worthwhile reading.
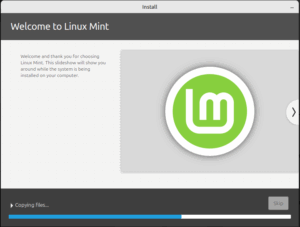 Fig 13
When installation is complete, you will be asked to restart your computer. Click on “restart” and when the restart begins, remove the USB stick from the USB port.
After restarting you should be greeted with the Grub boot screen where you can choose to boot Windows 10 or Linux Mint by using the arrow keys and pressing the Enter key.
Enjoy exploring your new Linux Mint Cinnamon OS.
5B Erasing the disk and installing Linux Mint (replacing Windows 10) option
If you chose the “Erase disk and install Linux Mint” option (at the green arrow) back before step 5A (Fig 8), and again shown below (Fig 14), then the disk which Windows is on will be wiped, with Windows removed to allow Linux Mint to take over the entire drive. Hopefully, you have backed up all and any important files (eg documents, photos, videos, etc) before you started this entire adventure.
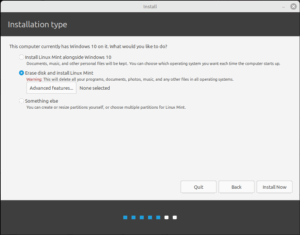
Fig 14
Once you chose “Erase disk and install Linux Mint” as in Fig 14, click on “Install Now” and click “Continue” if you get a “Write the changes to disks?” Dialog box as shown below (Fig 15).

Fig 15
Click on Melbourne on the “Where are you?” dialog box shown below (Fig 16) and click “Continue”.
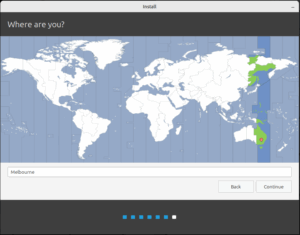
Fig 16
In the “Who are you?” dialog box displayed below (Fig 17), fill in your details then click on “Continue”. At this stage you can opt to Click on the “Log in automatically” option so that you do not need to enter your password at the logon screen and go directly to the desktop.
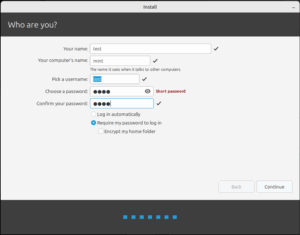
Fig 17
Linux Mint will then begin to install as shown below (Fig 18). A slideshow of information will be displayed as installation proceeds. You can go forwards/backwards in the slides by clicking on the arrows at the sides of the slides if you wish.
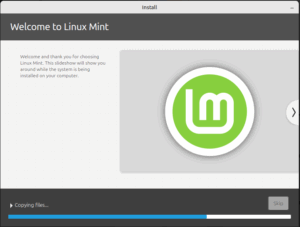
Fig 18
At installation completion you will get the screen below (Fig 19). Click on “Restart Now” to finish installation and restart your computer.
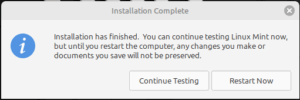
Fig 19
As your computer restarts, remove your USB Mint installation stick from the USB port. After a few moments you will be asked to enter your password at the login screen (Fig 20), then press Enter.
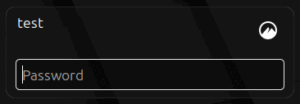
Fig 20
You should arrive at the Welcome dialog box shown below (Fig 21).
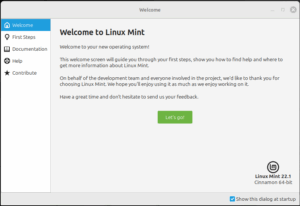
Fig 21
Time to start exploring and enjoying your new operating system, Linux Mint Cinnamon.
I’ll try and put some more articles in PC Update on how to update and use Mint over the next couple of issues.
Feel free to join us other Linux users online via Zoom at the Northern Suburbs Linux SIG run by David Hatton every 3rd Monday of the month. See the monthly calendar on MelbPC web site for details and subscribe to the SIG mailing list to get reminders for the SIG meeting.
Enjoy