Tuning Up Your Windows 10 Start Menu
11th August 2020
Tom Burt, Vice-President, Sun City Summerlin Computer Club
Windows 10 was originally released in July 2015. It’s latest major update is V2004 – this article is written using the Fall 2209 update. Originally, I had mixed feelings about Windows 10’s new hybrid “list and tiles” Start menu. However, I gradually came to like it as a way to declutter my desktop and actually make it easier to find things. Here’s a screenshot of my desktop today:
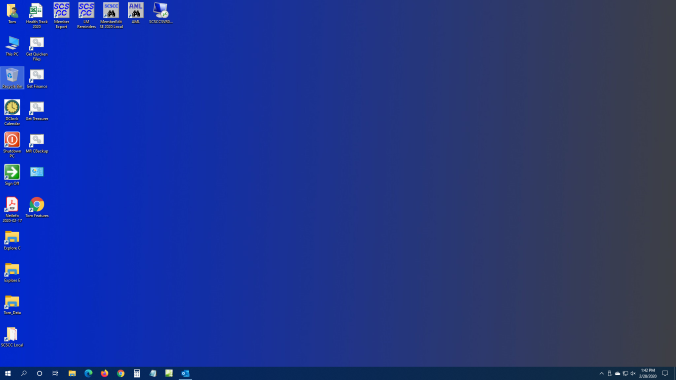
Tom’s Windows 10 Desktop
The exact details don’t matter. As you can see, I have about two dozen icons on the desktop that I use to launch applications, access data folders, or run command scripts. Over four years of using Windows 10, I’ve steadily reduced the original number of desktop icons by half. However, even now, when I’m working intensely and need to start an application while I have others running, it gets irritating. Often I have to minimize or move those other apps to uncover the desktop icons so I can double-click the one I need to launch the new app. Also, to launch from a desktop icon I need to double-click it – something my ageing fingers no longer do well. (Note – I prefer not to use the “single click to open” setting – too many misfires.)
The Windows 10 V1909 Start Menu is the best incarnation yet and helps me with some of the above issues. You can open the Start Menu by clicking the flag icon at the far left of the taskbar or by simply pressing the Windows key. Following is a screenshot of my current Start menu:
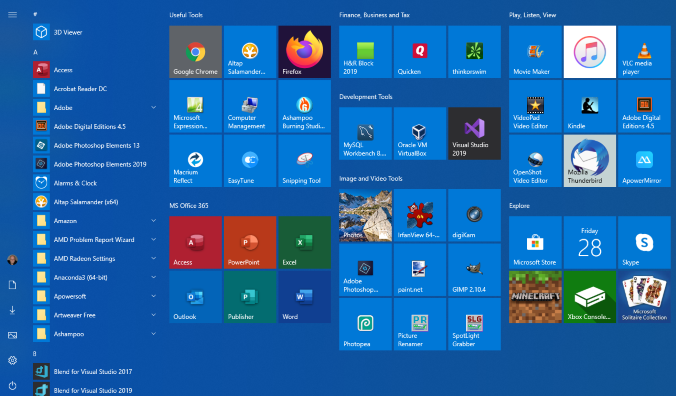
Tom’s Windows 10 Start Menu
I have stretched the Start menu out to allow three 3-column groups and have all my tiles sized to the medium, square size. In this layout, I don’t need to scroll to find a particular tile. The tiles are grouped and labeled along functional lines, such as “Useful Tools,” “Image and Video Tools,” “Finance, Business and Tax,” “MS office 365” and others. The app tiles I use most are at the top left.
To launch an app, I just press the Windows key to pop open the Start menu and then click the tile of the app. The app starts up and the Start menu closes back up. I no longer need to uncover desktop icons and double click. Tiles are especially nice on hand-held touch screen devices.
Down the left side of the Start menu is the standard complete, alphabetical list of all installed programs. You can right-click on any program in the list and choose “Pin to Start” to add a tile for that program to the array of tiles. You can then drag the tile to wherever you want it in either an existing group or a new group. You can right-click the tile to adjust its size too small, medium, wide or large. The wide and large sizes are useful for “modern” apps that animate their tiles with “live” content. News and Weather apps are examples. The medium tiles display the app’s name and an icon.
You can adjust the width of the Start menu by opening it, positioning the mouse cursor over the right edge until the cursor turns to a double arrow, and then dragging to the right (to widen) or to the left (to narrow). Tile groups will automatically move to fit the new shape of the Start menu window. You can adjust the height of the Start menu by opening it, positioning the mouse cursor over the top edge until the cursor turns to a double arrow, and then dragging up or down.
You can rename tile groups by clicking the space just above the group and then typing a name. You can move entire groups around by clicking and dragging the group’s title space.
To remove a tile from the Start menu, right-click it and select “Unpin from Start”..That program will still be listed in the Start menu’s left-side list of all installed programs. I got rid of quite a few of the Windows default tiles for apps like Candy Crush that I never use.
To add a tile/icon to the Windows Taskbar, right-click either the tile or the program name in the program list. In the pop-up menu, hover the mouse over the “More” option to get a second pop-up and choose “Pin to Taskbar.” After the icon appears on the Taskbar, you can drag it left or right to where you want it to be permanently.
You can also add desktop (or other) shortcut icons to the Start menu’s tileset. Just right-click the desktop shortcut and choose “Pin to Start”. This will create a new tile on the Start menu that points to the app or folder targeted by the original desktop shortcut. You can then remove the original shortcut from the desktop. This can help to further declutter your Windows desktop.
You may have noticed that my Start menu is coloured differently than the Windows 10 default. It’s easy to customize the Start menu’s colour. Go to Start > Settings > Personalization > Colors and then, under “Choose your accent color,” pick a colour from the Windows colour palette or click the + icon to choose a custom colour. The accent colour is used as the colour of window title bars and as the background for the Start menu. The background colour of the tiles is also coloured to complement the accent colour.
So that’s a quick summary of things you can do to make the Windows 10 Start menu work better for you!
Reprinted with permission from the March 2020 issue of Gigabyte Gazette.