UEFI Configuration for Booting Live Media
13th February 2021
Dick Maybach, Brookdale Computer User Group
In modern PCs the boot process is controlled by a Unified Extended Firmware Interface (UEFI), that has replaced the old Basic Input-Output System (BIOS), see https://en.wikipedia.org/wiki/Unified_Extensible_Firmware_Interface. Most users, who purchase a machine with Windows installed, can ignore the change, but if you wish to change its configuration you will have to be aware of its differences. In particular, if you wish to enable booting from a live USB device you will want to:
- require a password to access the PC,
- allow booting an alternate operating system from a live memory stick or DVD, and
- allow other operating systems than Windows.
The first challenge is to access the configuration utility, which requires tapping keys during the boot process. (You will have to be quick.) The details vary with the manufacturer, but some common ones are:
- ASUS PCs: <F2>,
- ASUS Motherboards: <F2> or <DEL>,
- Acer: <F2> or <DEL>,
- Dell: <F2> or <F12>,
- Gigabyte/Aorus: <F2> or <DEL>,
- HP: <F10>,
- Lenovo Laptops: <F2> or <Fn> + <F2>,
- Lenovo Desktops: <F1>,
- Lenovo ThinkPads: <ENTER> then <F1>.
- Samsung: <F2>, and
- Toshiba: <F2>.
Check your documentation for others. Windows 10 users can also reach their UEFI configuration through the Advanced Start Menu.
The storage area available to a BIOS was limited, which meant that configuring one was relatively simple, but this restriction was eliminated for a UEFI. As a result, manufacturers have added numerous “features” to differentiate their products from the competition. For example, I have two nearly identical Dell laptops, the older using a BIOS (with five setup screens) and the newer using a UEFI (with nearly 70). The major problem with the latter is finding what is important to you.
You can improve your PC’s security by enabling passwords; however, these aren’t effective against a knowledgeable attacker, as they can be disabled by opening the case and manipulating a switch or jumper. There are two passwords, “system” allows the boot process to proceed and “administrator” allows changing the UEFI configuration. You should always enable an administrator password to prevent someone from enabling booting from your USB port, which would allow them to boot a live medium and access your disk. For a similar reason, if you’ve enabled USB booting yourself, prevent someone else from doing so by setting a system password.
Figure 1 shows the opening UEFI configuration screen on my Dell laptop, which displays its table of contents.
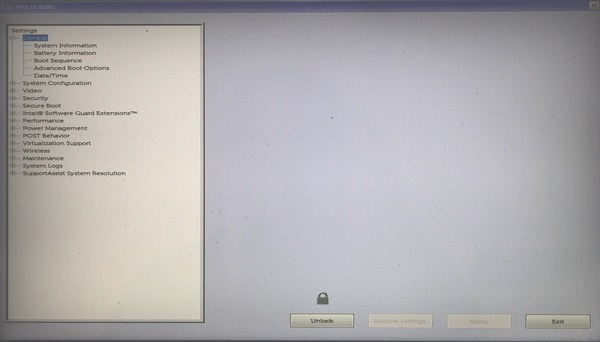
Figure 1. UEFI First Configuration Screen.
Note the Unlock button at the bottom. Select this and enter your administration password, assuming you’ve set one, to make changes.
Most PCs require a keypress at the start of the boot process to enable booting from a USB port (assuming of course you’ve enabled it). Here are some common ones.
- Acer: <Esc> or <F9> or <F12>
- Asus: <Esc> or <F8>
- Dell: <F12>
- Fujitsu: <F12>
- Gigabyte: <F12>
- HP: <Esc> or <F9>
- Intel: <F10>
- Lenovo: <F12>
- Samsung: <Esc>
- Toshiba: <F12>
Check your documentation for others.
To enable booting from a USB device you will make these changes.
- Disable secure boot.
- Set the boot sequence.
- Enable booting from legacy ROMs.
- Enable USB boot support.
- Disable fast boot.
Record its settings before you change anything on a screen (taking a cell-phone photo is a convenient way to do this). Some settings will result in your PC being unable to boot (ask me how I know), but this isn’t a problem if you can undo your last change. If all else fails, most UEFIs have a way to restore the factory settings. On my Dell, it’s on the screen of Figure 1 as the (grayed out) button at the right of Unlock. It is enabled by unlocking the UEFI configuration.
Secure boot prevents booting from any operating system that doesn’t have a Microsoft certificate, which few OSes other than Windows have. You must disable this if you want to run Linux, but it is a security feature, and you may wish to enable it when you go back to Windows. Figure 2 shows the appropriate screen on my Dell, which follows the security section.
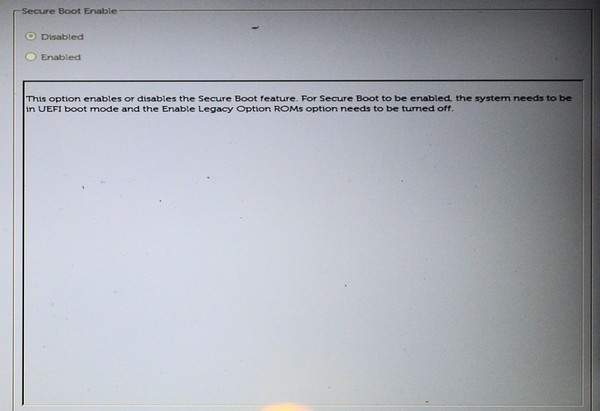
Figure 2. Secure Boot Screen.
Set the boot sequence to include USB devices, Figure 3.
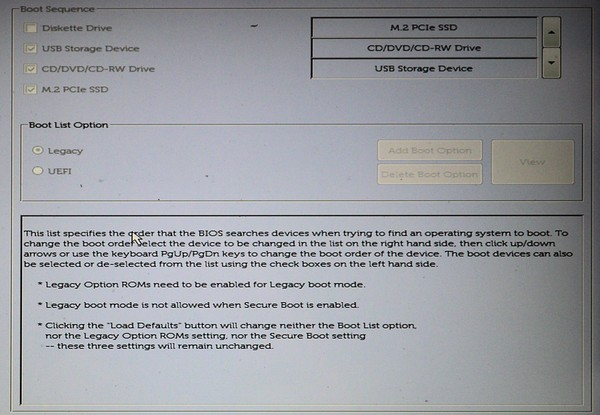
Figure 3. Boot Sequence.
Following the advice on Figure 3, enable legacy option ROMs, Figure 4.
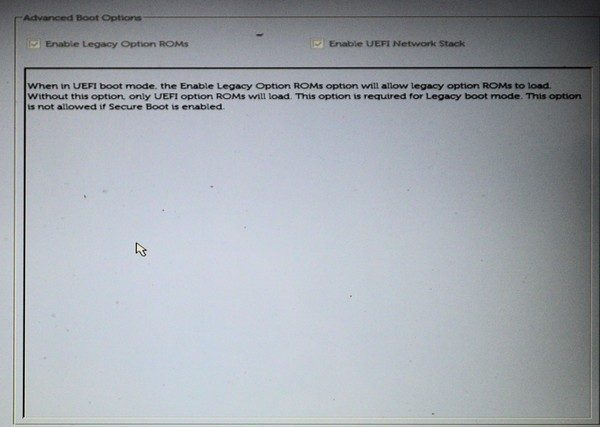
Figure 4. Enable Legacy Option ROMs.
Also enable USB boot support, Figure 5.
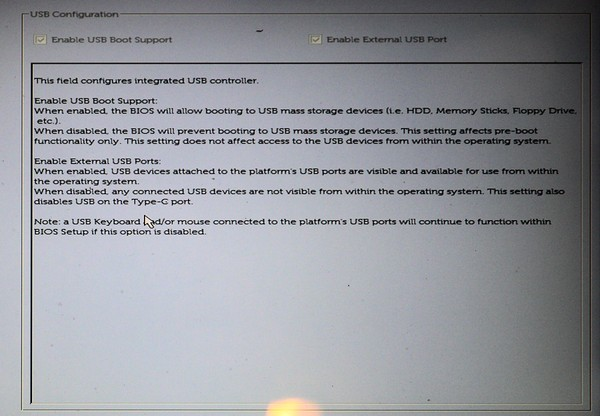
Figure 5. USB Boot Support.
Finally, disable fast boot support, Figure 6, as this is compatible only with recent versions of Windows.
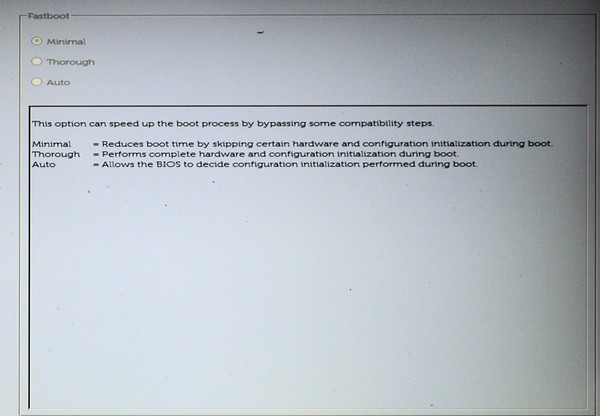
Figure 6. Disable Fast Boot.
Although I’ve used Dell as an example, the UEFI configuration on your PC is probably similar. Explore carefully, read the help text, and be sure you can undo your changes. Even if you don’t make changes, exploring your UEFI configuration will tell you much about your PC.