Dave Williams
This is the first part of a series of articles on Dave Williams’ experience of building a CNC (computerised numerical control) router, which is an automated cutting machine that can be used on materials such as wood, composites, aluminium etc.
It’s been a long time coming, but I’ve finally made some good progress with my CNC router project. After my move up to Queensland, I finally had the shed space to work on this, and spent quite a significant portion of 2020 researching and working on the design and deciding what features I wanted, with near constant tweaking of the design in CAD. I’m a big fan of the CAD design process because it allows me to test ideas virtually before having to commit to any big purchases.
This is the design I ended up with:
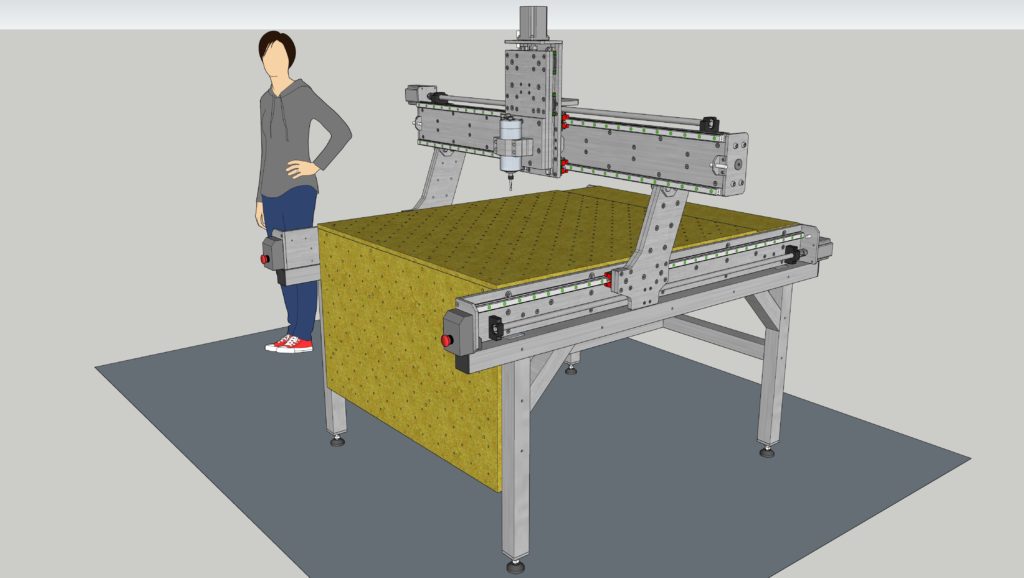
There were certain principles and aspects that I wanted to incorporate into the design, such as the table surface that sat slightly above the sides of the machine and an extra-wide gantry. This was done to maximise the working area, and also to allow for extra long work pieces that could hang off the end of the table. The front ‘apron’ of the machine is to allow for end-milling, which could allow for things like dovetail or mortice & tenon type joinery, or any other techniques that require the work piece to be mounted vertically.
Another key aspect that I wanted to integrate into the design was the ability to upgrade the machine as time goes on. For example, the extra-wide gantry allows for a possible automatic tool change (ATC) spindle to move off to the side to a rack that has multiple tool holders lined up. Or alternatively, there could be a rotary fourth axis mounted there. I don’t know how far I will want to upgrade this machine, but I knew that it was important for me to allow for that possibility, even if I don’t end up going down that path.
During the early design and concept phase, I kept having this idea bouncing around my head, which was that rigidity is a key requirement in a CNC router, and that steel has 3 times the stiffness of aluminium for a given cross section; so I made the decision to design it all around 16mm thick steel plates for the main frame components. After a lot of exchanging emails and getting quotes from many places, I settled on a business in Brisbane that does laser cutting of steel, and they were also able to tap the holes for me as well, which was quite a relief, because manually tapping hundreds of holes wasn’t too appealing to me. I did have to clean up the tapped holes, but this was pretty easy with a spiral point tap mounted in a hand drill.
Here are all the parts freshly collected from the laser cutting place:
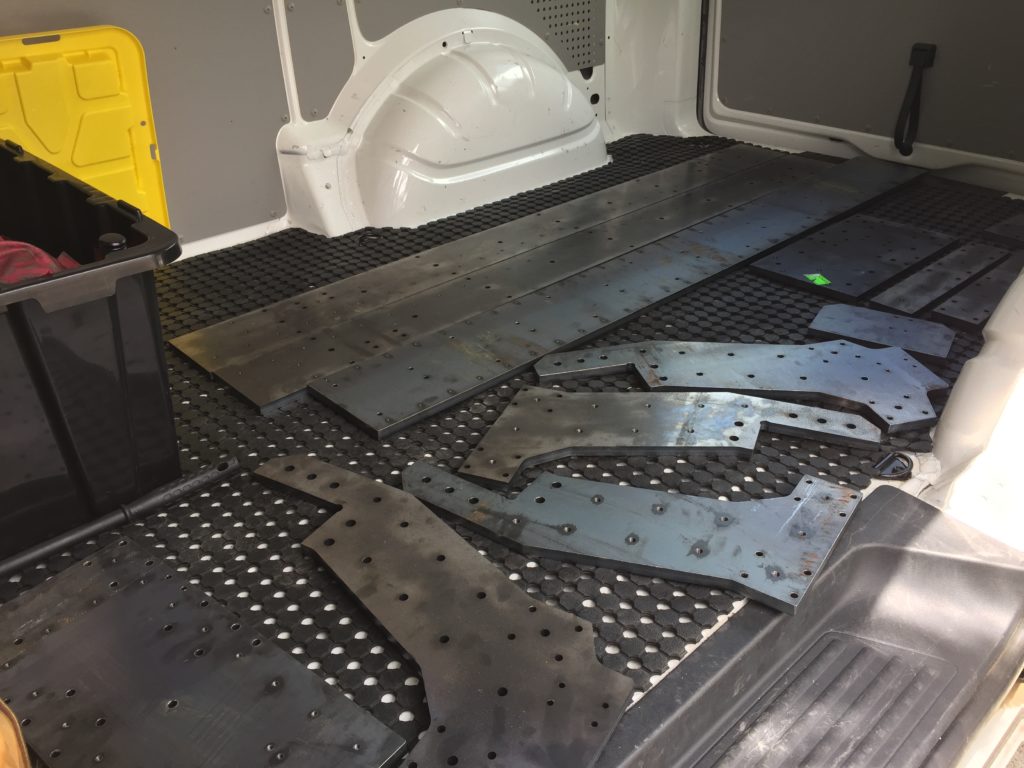
The laser cutting worked rather well, it’s quite a clean-cut edge compared to the plasma cutting that I was initially considering.
The other skill that I needed to develop for this project was welding. It’s something I’ve been wanting to learn for a very long time, and I also wanted to have the capability to weld aluminium and other alloys for future projects, so I pulled the trigger on a Unimig 200A AC/DC TIG welder. Youtube is such an amazing resource for learning new skills… A welder I certainly ain’t (yet), but it provided enough of a basic introduction to get started, and I’m pretty happy with how this base frame turned out.
I got the steel (65 x 65 x 4mm SHS) cut to size for me, so I could rely on the cuts being fairly square and hopefully, that squareness would translate to my welded frame somewhat.
The legs were first, and I used that as an opportunity to get my eye in as far as the welding process was concerned.
The question remained, how do I weld up a frame as flat as possible when I don’t have a flat reference surface? (The concrete slab in the shed is no way near even or flat). The answer to this was slowly and carefully. I used little wooden wedges to chock things up and spent a great deal of time tapping things around and using a level and engineers square to check every single part of it, then just slowly and carefully started tacking everything up while continually checking everything as I went.
Judicious use of ratchet straps throughout the welding process helped to pull things straight and square.
It started to get quite heavy, which is good, but still (just) manageable for one person to kind of manoeuvre around.
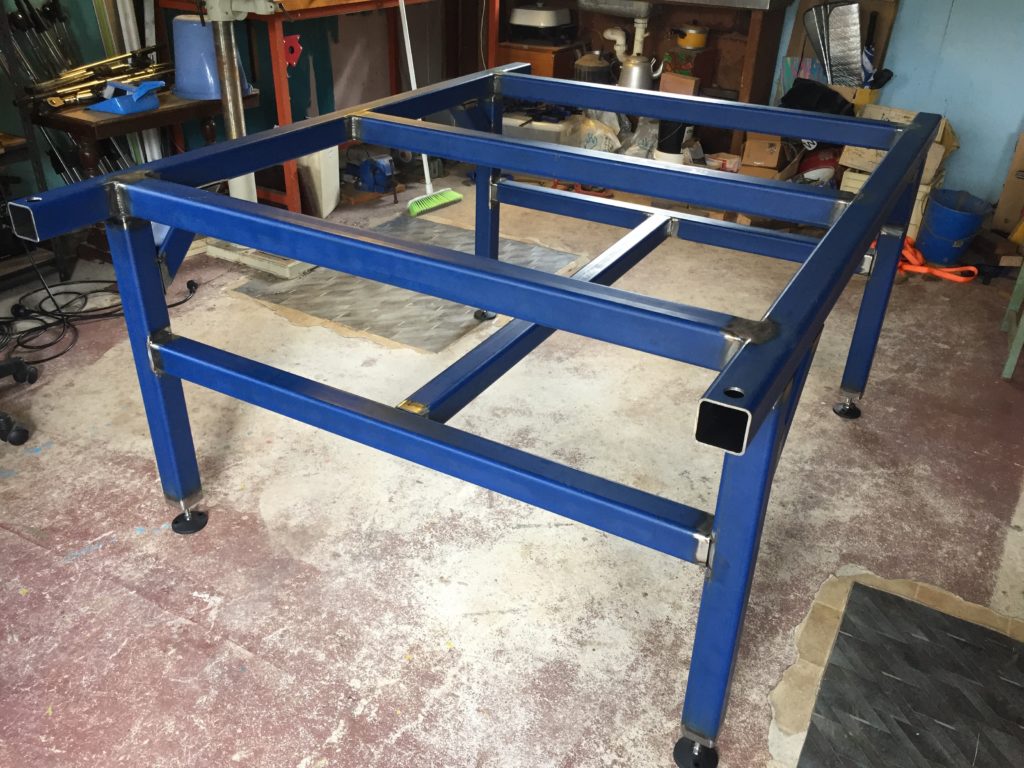
It was a couple of weeks until I was able to do a second lot of welding, but I was able to get all joins finally welded up. It’s nice and heavy and solid, and should serve as a good base for the machine!
To be continued next month…