Fleur Stephens
Now that you’ve created your portable web server, you might like to install WordPress. An offline WordPress installation is great for practising WordPress, testing themes and plugins, and offsite website development. Follow the tutorial below to create a WordPress installation of your own.
- First, we need to enable our webserver.
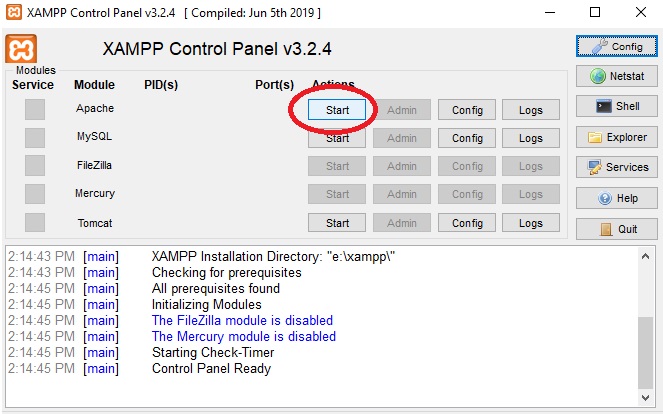
Locate your USB stick/portable drive, open the Amp folder, locate and open the xampp-control.exe file (right-click Run As Administrator). When xampp opens, locate and hit the Start button for the Apache module (as shown in the picture above) and the MySQL module (just below the Apache module). This will start the webserver and the MySQL component.
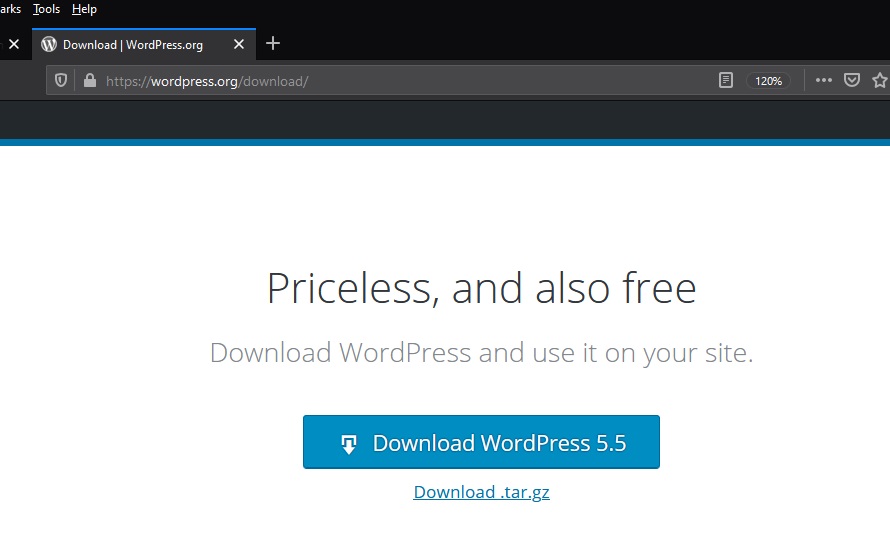
- Next => download WordPress, go to https://WordPress.org/download/ and select WordPress 5.5. See the screenshot below.
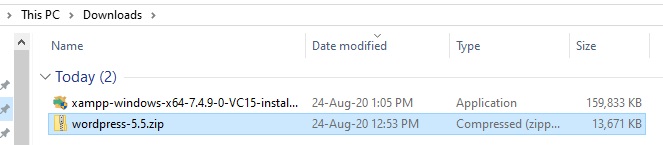
- Now we need to find and unzip the download. It should be in your Downloads folder, double click the file to unzip it.
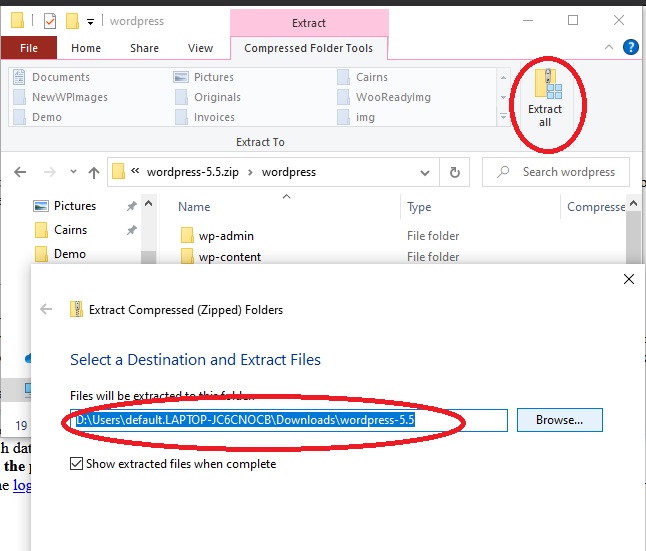
Then select Extract all. This will pop up an input page that asks you to select the destination for the files. Select the Browse button and locate your USB drive followed by xampp and htdocs (htdocs folder is inside the xampp folder) and hit Select. Do not hit Extract yet. Instead I want you to add a backslash then your website name followed by another backslash. E.g. ‘\Demo\’, so my full path now looks like ‘E:\XAMPP\htdocs\Demo\’. Once you have done this hit Extract. This will create a folder and place my WordPress folder in it. See the screenshot below, the Extract all button is circled in red (top right), by hitting this button the Select a Destination and Extract Files pop up is launched. The area circled in red is where the path E:\XAMPP\htdocs\Demo\ was created before selecting the Extract button (located in the bottom right-hand corner, not shown in this screenshot).
- While WordPress is copying let’s open phpMyAdmin and create our database.
Open your favourite web browser on your PC and type localhost in the URL bar and hit Enter, see the screenshot below.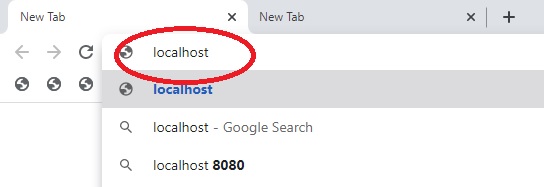
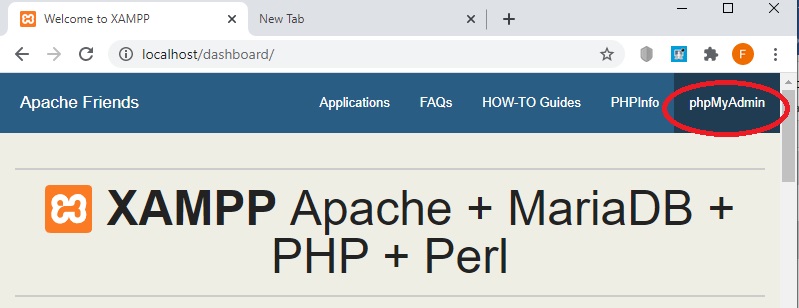
This should open the localhost index page. On the top right-hand side of the page you should see the phpMyAdmin, select it to open phpMyAdmin. See the screenshot below.
This should open the phpMyAdmin page shown below. PhpMyAdmin is a user interface for MySQL, we want to use it to create a database for WordPress to use. To do this locate the Databases tab, see below.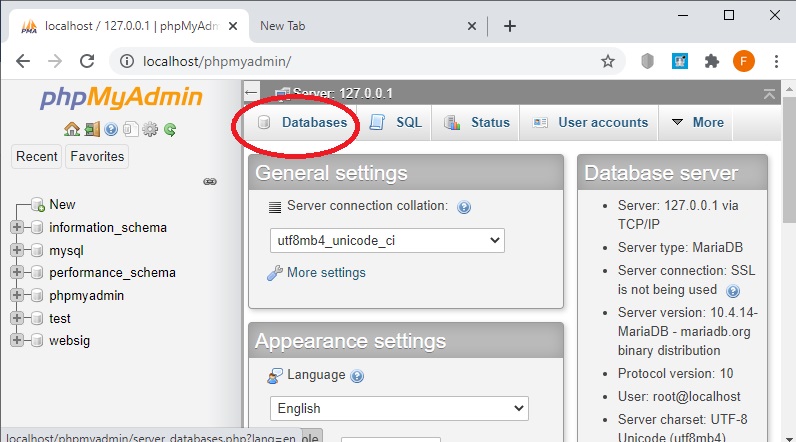
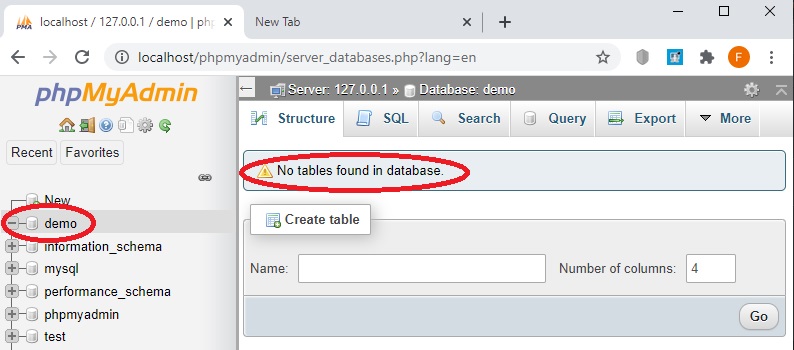
Enter a name for your database. Please see the picture below (I called my database Demo). Type in your database name, leave the database type as default (mine is utf8mb4_general_ci ) and hit the Create button.

If you have successfully created your database you should see your database on the left of your screen and a “No tables found in database” warning. See the screen shot below.
Our WordPress files should have finished extracting by now so navigate to your xampp WordPress files, mine are located at E:/xampp/htdocs/Demo/WordPress, select all of the contents in the WordPress folder then right click on the contents and select cut, now navigate back to your website folder and paste the contents in. Basically, we are removing the WordPress folder by copying its contents directly into our website folder. This will reduce the need to add WordPress in your URL to get to your website later. If we omit this step our website URL will be localhost/Demo/WordPress/ after moving our files one folder up we now have a URL that is shorter which is localhost/Demo/.
- Next, we need to add our login details to our wp-config.php file. If you plan to launch your site/webserver on the Internet you need to create a user and password to ensure your site is secure. This tutorial assumes the webserver will stay offline and as such we will use our defaults values; they are as follows
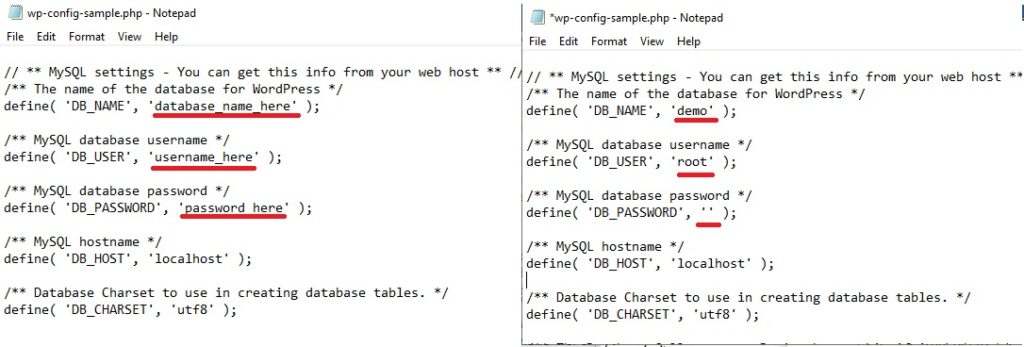
- The name of the database for WordPress; DB_NAME = demo (the name I gave my database)
- MySQL database username; DB_USER = root
- MySQL database password; DB_PASSWORD= (we left it blank)
- MySQL hostname; DB_HOST = localhost
Now that we have our values, we need to open the wp-config-sample.php file, it should be located in the first folder of our WordPress installation.
My wp-config-sample.php file is located at E:/Xampp/htdocs/Demo, now that I’ve found my file I need to right-click, select open with, then select Notepad. Alternatively, I could first open Notepad, by typing notepad in my Windows search bar and opening the file using Notepad.
When you have opened your file, scroll down to the MySQL values and add your values. The screen shot below shows your wp-config-sample file values on the left and our new values on the right.
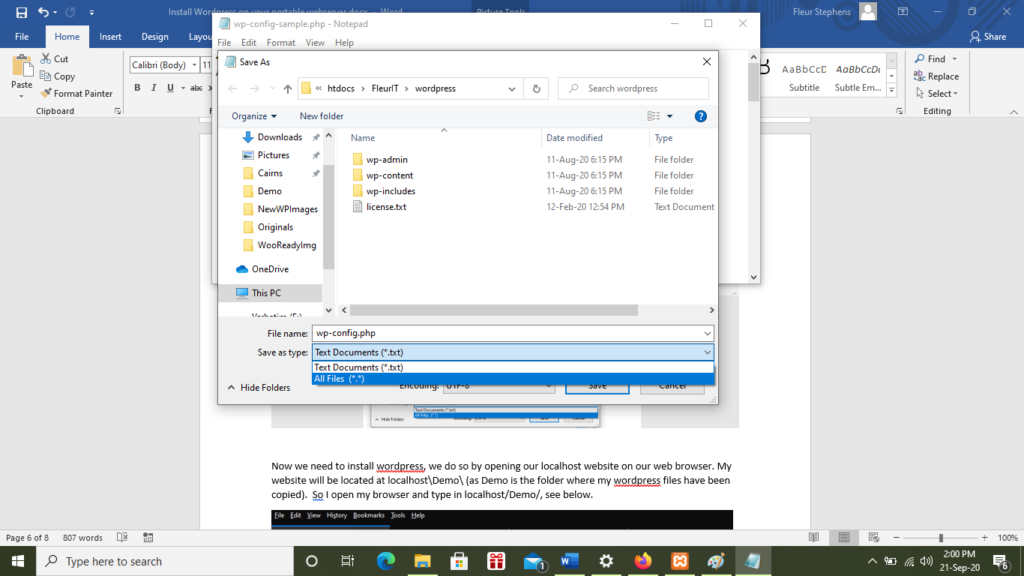
Now save your file as wp-config.php. To save this file as a PHP file, remember to select All Files (*.*) when saving, see the screen shot below. Note, we are saving this file as wp-config, not wp-config-sample.
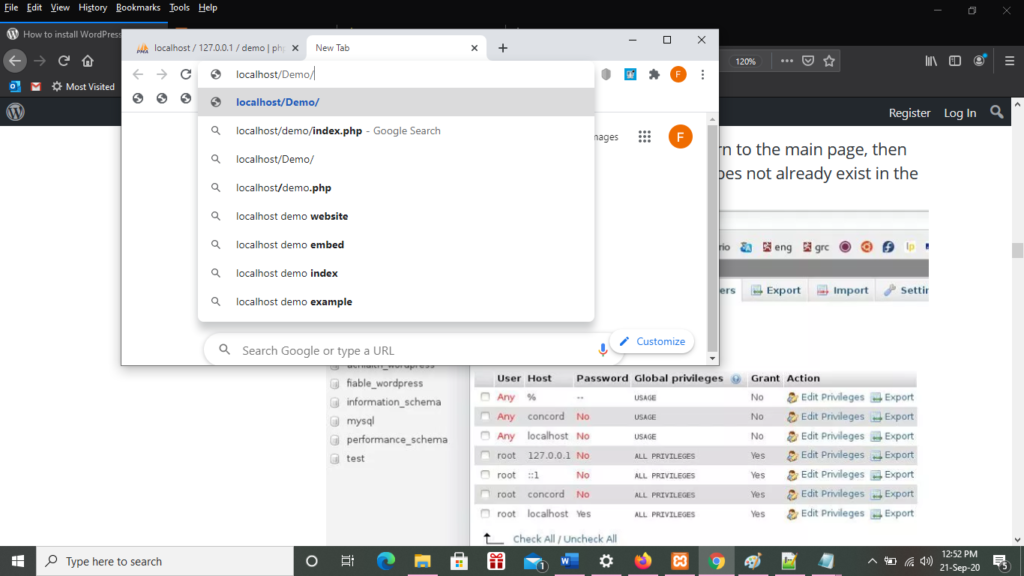
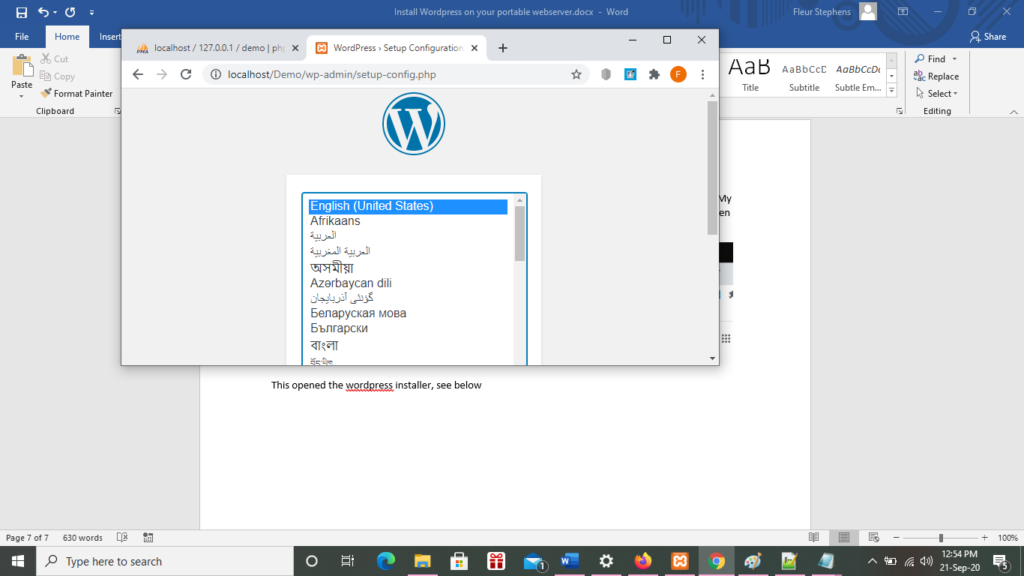
- Let’s install WordPress; we do so by opening our localhost website on our web browser. My website will be located at localhost\Demo\ (as Demo is the folder where my WordPress files have been copied). So, I open my web browser and type in localhost/Demo/ in the URL bar, see below.
This opened the WordPress installer, see below:
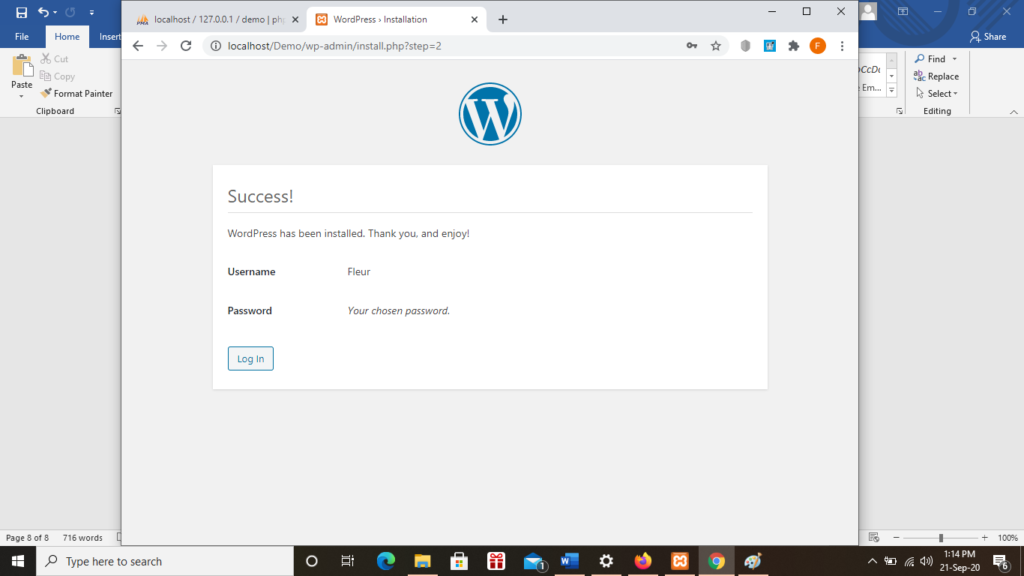
From here I select my language, followed by Continue. This opens the next screen that asks me for the Site Title (website name), Username, Password and Email Address. I have given my website, Demo, as its site title, Fleur as my username (this is the username I will use to log into my WordPress site), a password and my email address. I have opted to leave Search engine visibility unchecked.
Don’t forget to record your username and password for the site.
See the screenshot below.
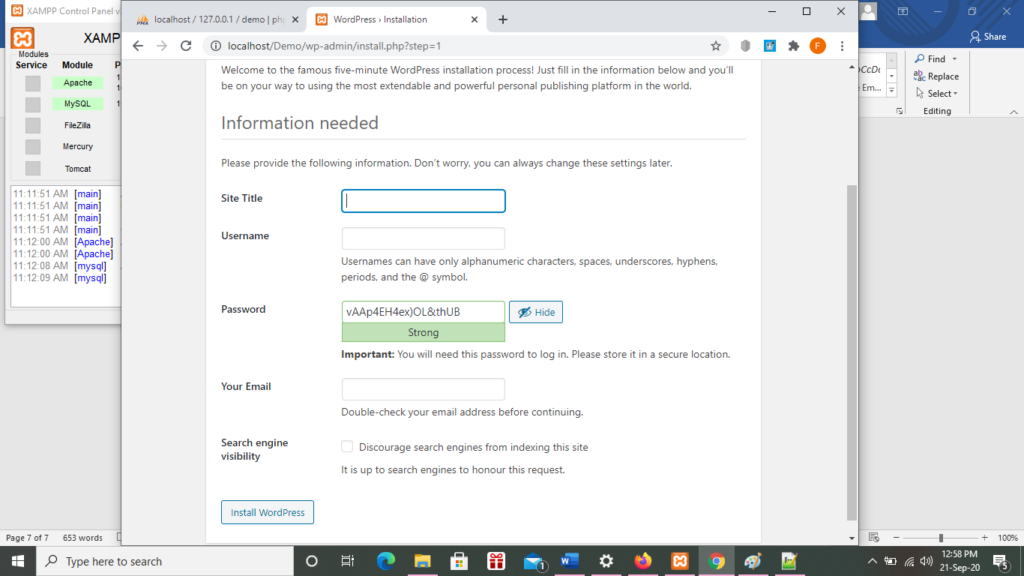
Finally, hit the Install WordPress button, to complete the installation. If things have gone according to plan you should see the screen below. Hit the Log In button to launch WordPress.